The complexity of the issues in Gnome GTK 3 makes it a little confusing to add desktop themes in Ubuntu 11.10. This is because there is no default tool of Ubuntu 11.10 to change themes. However, you can change and manage the issues of Gnome in Ubuntu 11.10 with the help of a third party application known as the Gnome Tweak Tool. In this post, we'll tell you how to install and manage themes for Gnome 3 on Oneiric Ocelot.
To get started, install Gnome Tweak Tool
Gnome Tweak Tool can be installed using the following command:
sudo apt-get install gnome-tweak-tool
Other than using the command line, you can also grab the Gnome Tweak tool package for Oneiric from Launchpad.
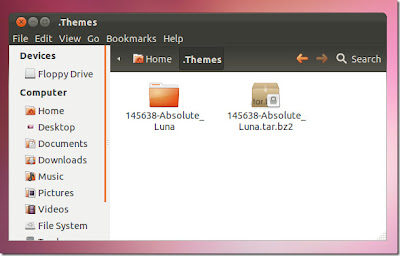
Go to the Home directory, hit CTRL+H hotkey to show hidden files and folders, and create a new folder named .Themes via right-click context menu.

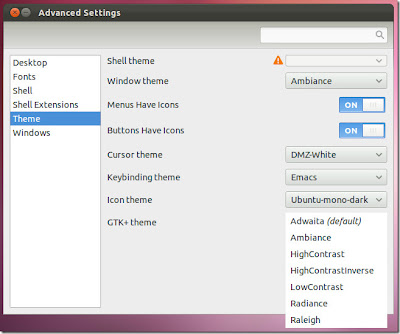
Now, open the Gnome Tweak Tool from Applications -> Other -> Advanced Settings. Go to Themes

Installing themes on ubuntu 11.10 (Tutorial)
Installing themes on ubuntu 11.10 (Tutorial) was published by . We hope that information about Installing themes on ubuntu 11.10 (Tutorial) very usefull for you. You can get another usefull information related with Installing themes on ubuntu 11.10 (Tutorial) at our sharing post in facebook, twitter and etc.. Warm regard from us.
 Tweet
Tweet


0 comments:
Post a Comment